Your Mac has excellent built-in microphones, arguably the best in the laptop world. But physics is physics. A tiny membrane embedded in a laptop chassis or a monitor bezel simply cannot capture the warmth, depth, and presence of your actual voice. It picks up the room echo, the clack of your keyboard, and the spin of your hard drives.
When you upgrade to a dedicated USB-C microphone, the difference is immediate and jarring. Suddenly, you don't just sound clearer; you sound authoritative. Whether you are leading a team call, recording a voiceover for a tutorial, or just chatting on Discord, a proper dynamic or condenser mic puts your voice front and center and pushes the background noise into the void.
The beauty of the current market is that you no longer need an XLR interface, a cloud lifter, or a degree in audio engineering to sound like a broadcaster. We have tested the best USB-C microphones that plug directly into your Mac and work instantly, respecting your desk space and your wallet.
Affiliate disclosure: some links in this article are Amazon Associate links. If you buy through them, Next Level Mac may earn a small commission at no extra cost to you, and we only recommend products that genuinely bring value to your Mac setup.
The Professional Standard
The Shure MV7 has become the icon of the modern desk setup for a reason. It is a dynamic microphone, which is a crucial distinction for most home offices. Unlike condenser mics that pick up every bird chirping outside your window, dynamic mics like the MV7 are less sensitive to background noise and focus laser-tight on the sound directly in front of them.
I love the versatility here. It offers both USB-C and XLR outputs, meaning you can plug it straight into your Mac today, but if you eventually upgrade to a high-end audio interface, the mic grows with you. The "Voice Isolation" technology is not just marketing fluff; it legitimately saves you from having to treat your room with acoustic foam. The touch panel on the mic itself lets you slide to adjust gain or tap to mute instantly—a feature that saves you from fumbling for the mute button in Zoom while you cough.
Here's where to get the Shure MV7 USB Microphone (Amazon Affiliate Link): https://www.amazon.com/dp/B08G7RG9ML?tag=nextlevelmac-20
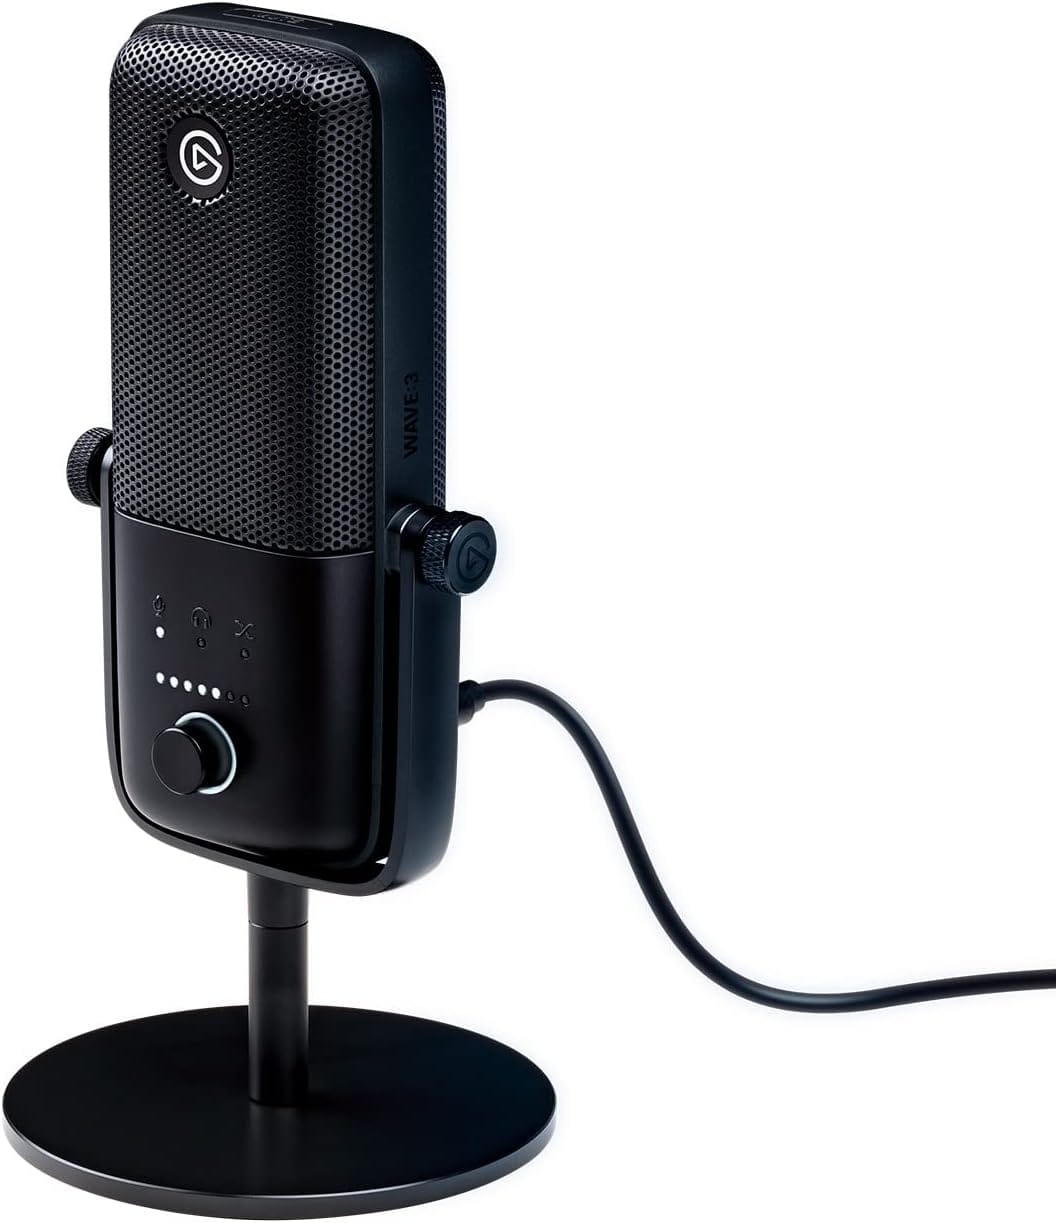
The Software Superpower
Hardware is only half the battle; how your Mac processes that audio matters. This is where the Elgato Wave:3 separates itself from the pack. While the microphone hardware is excellent—crisp, clear, and condenser-based (so it sounds very detailed)—the real magic is the Wave Link software that comes with it.
Wave Link acts as a digital mixer inside your Mac. It allows you to separate your audio sources—game audio, music, voice chat, and system sounds—into different channels. For streamers or anyone recording tutorials, this is indispensable. You can control exactly what your audience hears versus what you hear. Plus, the mic features "Clipguard" technology, which automatically prevents your audio from distorting if you get too loud or laugh unexpectedly. It’s like having a safety net for your audio levels.
This is where you can get the Elgato Wave:3 (Amazon Affiliate Link): https://www.amazon.com/dp/B088HHWC47?tag=nextlevelmac-20
The Budget Workhorse
You do not need to spend hundreds of dollars to get audio that sounds ninety percent as good as the top tier. The Audio-Technica ATR2100x-USB is a legendary recommendation in podcasting circles because it is virtually indestructible and sounds fantastic for the price.
Like the MV7, this is a dynamic microphone. It ignores the fan noise of your external drives and the hum of your AC unit. It connects via USB-C directly to your Mac, but also includes an XLR port for future-proofing. It does not have fancy software or touch controls—it has a simple on/off switch on the body and a headphone jack for zero-latency monitoring. It just works, every single time. It is the perfect travel mic or starter mic for anyone tired of their AirPods' audio quality.
Where you can purchase the Audio-Technica ATR2100x-USB (Amazon Affiliate Link): https://www.amazon.com/dp/B07XP21LBQ?tag=nextlevelmac-20
Why Dynamic Mics Win at Home
You will notice two of our three picks are "dynamic" microphones. This is intentional. Most people working from home do not have sound-treated studios. We have hardwood floors, glass windows, and high ceilings—nightmares for audio reflection.
Condenser microphones (like the Blue Yeti or the Wave:3) are incredibly sensitive. They sound rich and detailed, but they hear everything. If you have a quiet room, they are amazing. But if you have a dog barking downstairs or a loud mechanical keyboard, a dynamic mic (Shure MV7, ATR2100x) is much more forgiving. It rejects off-axis noise, meaning it mostly hears what is right in front of it and ignores the rest.
Mounting Matters
Buying the mic is step one. Step two is getting it off your desk. Most of these mics come with a small desk stand, but using it is a mistake. When the mic sits on your desk, it absorbs every vibration from your typing. Every time you hit the Spacebar, your listeners hear a "thud."
Get a simple boom arm. It does not have to be expensive. A boom arm allows you to float the microphone right in front of your mouth (where it sounds best) while keeping your desk surface clear for your mouse and keyboard. It also mechanically decouples the mic from the desk, eliminating those typing thuds.
Configuring Input Settings in macOS
Once you plug your USB-C mic in, macOS usually recognizes it instantly. However, do not trust the default settings.
Go to System Settings > Sound > Input. Select your new microphone. Speak into it at a normal volume and watch the input level bar. You want the bar to bounce comfortably in the middle to upper range without hitting the far right side. If it hits the end, you are "clipping" (distorting). Drag the "Input volume" slider down until your loudest speaking voice stays in the safe zone.
Also, check your specific apps. Zoom, Teams, and Discord often have their own "noise suppression" features enabled by default. Since you now have a high-quality mic that naturally rejects noise, these software filters can actually make you sound robotic. Dig into your app settings and turn off "Background Noise Suppression" or set it to "Low" to let the natural quality of your new mic shine through.
Monitoring Your Audio
All three microphones listed above feature a 3.5mm headphone jack on the body of the mic itself. This is for "zero-latency monitoring."
When you plug your headphones into the Mac, there is a tiny delay (latency) between when you speak and when you hear yourself, caused by the signal going into the computer and back out. It can be disorienting. When you plug headphones directly into the microphone, you hear your voice in real-time, exactly as the mic hears it.
This is critical for voice training. Hearing yourself clearly stops you from shouting (because you can hear how loud you are) and helps you maintain a consistent distance from the microphone.
The Final Polish
Upgrading your microphone is the highest ROI upgrade you can make for your professional presence. People will forgive grainy video, but they will not forgive bad audio. Bad audio is fatiguing; it makes people want to end the call sooner.
Clear, warm audio signals competence. It makes you easier to understand and pleasanter to listen to. With a single USB-C cable and one of these mics, you stop being just another pixelated face on a screen and become a presence in the room.

Related Posts
Mac Audio Interfaces: Transform Your Recording Setup
Jan 06, 2026
Master Podcast Production with GarageBand on Mac
Jan 02, 2026
Mac Color Calibration for Photographers and Designers
Dec 27, 2025