Magnifier for Mac in macOS Tahoe transforms any connected camera into a real-time visual aid for examining documents, product labels, medication bottles, and other small text. The app lives in your Utilities folder and works with your iPhone through Continuity Camera or with any USB webcam, letting you adjust brightness, contrast, and color filters to make text readable at a glance.
Key Takeaways
- Open Magnifier from Applications > Utilities or search for it in Spotlight
- Use your iPhone as a wireless magnification camera through Continuity Camera
- Connect a USB webcam for a dedicated desktop magnification setup
- Activate Reader mode with Command-R to detect and enlarge text automatically
- Apply color filters like grayscale, yellow-on-black, or inverted colors for better contrast
- Run multiple live camera sessions simultaneously for different viewing angles
At-A-Glance: Magnifier Setup Options
The following table compares the two primary ways to use Magnifier for Mac, helping you choose the setup that fits your workspace and needs.
| Feature | iPhone (Continuity Camera) | USB Webcam |
|---|---|---|
| Setup Complexity | Wireless, requires same Apple Account | Plug and play via USB |
| Best For | Portable use, handheld scanning | Fixed desk station |
| Reader Mode | Supported | Supported |
| Multiple Sessions | Yes | Yes |
What Magnifier for Mac Actually Does
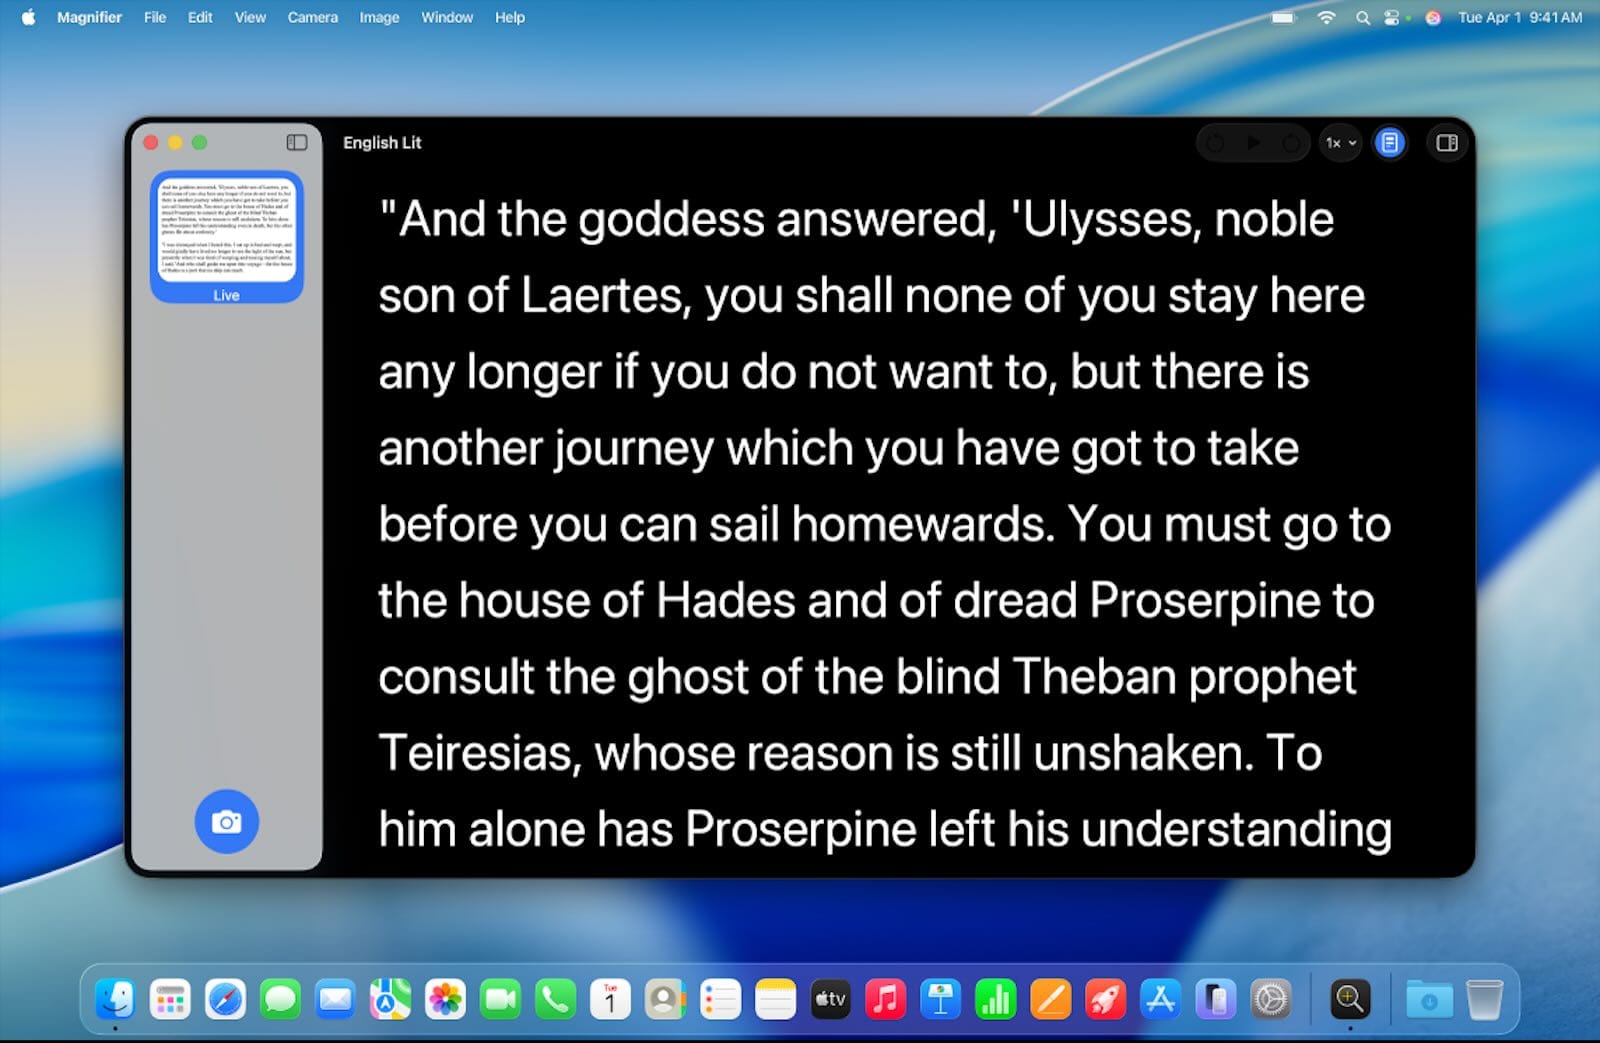
Magnifier is not a screen magnifier that enlarges your entire display. Instead, it creates a dedicated window showing a live feed from a connected camera, which you can then zoom, enhance, and filter in real time. Point the camera at a prescription bottle, a restaurant menu, or a product serial number, and Magnifier renders it large enough to read comfortably on your Mac's display.
The app supports multiple simultaneous camera sessions. This means you can have your iPhone pointed at documents on your left while a USB webcam handles items on your right, each in its own window with independent zoom levels and filters.
Apple designed Magnifier primarily for users with low vision, but the app proves useful for anyone who needs to examine fine details. Hobbyists inspecting circuit boards, collectors authenticating small markings, and anyone tired of hunting for reading glasses will find practical value here.
Setting Up Magnifier with Your iPhone
Continuity Camera, the feature that lets your Mac use your iPhone as a webcam, powers the wireless magnification experience. Your iPhone and Mac must be signed into the same Apple Account, connected to the same Wi-Fi network, and have Bluetooth enabled on both devices.
Launch Magnifier from the Utilities folder inside your Applications directory. Click the camera selection dropdown in the toolbar and choose your iPhone from the list. Your iPhone screen will display a "Connected to Mac" message, and the live camera feed appears instantly in the Magnifier window.
| NLM Spotlight | Product | Why We Love It | Price |
|---|---|---|---|
 | Check Price |
Affiliate disclosure: some links in this article are Amazon Associate links. If you buy through them, Next Level Mac may earn a small commission at no extra cost to you, and we only recommend products that genuinely bring value to your Mac setup.
Hold your iPhone over whatever you need to magnify. The pinch-to-zoom gesture works directly on your Mac's trackpad to adjust magnification level. Tilt the iPhone to change your viewing angle without repositioning the object. The wireless connection introduces minimal latency, though you may notice a slight delay compared to a wired webcam under poor network conditions.
Setting Up Magnifier with a USB Webcam
A dedicated USB webcam creates a more permanent magnification station. Position the webcam on a flexible arm or mount pointed downward at your desk surface, and you have an always-ready system for examining mail, documents, or small objects without picking up your phone.
This is where you can get the Logitech MX Brio, a 4K webcam that captures sharp detail even at high zoom levels: https://www.amazon.com/dp/B0BFJ4CRKD?tag=nextlevelmac-20
The MX Brio connects via USB-C and works immediately with Magnifier. Its Show Mode feature, which angles the camera downward to capture desk contents during video calls, aligns perfectly with magnification tasks. The 4K resolution means you retain readable detail even when zooming significantly into small text. One thing worth noting: the webcam's autofocus occasionally hunts when you first position an object, taking a second or two to lock onto the subject. Manually tapping the focus point in Logi Options+ can speed this up.
Connect your webcam, open Magnifier, and select it from the camera dropdown. The feed appears instantly, ready for adjustment.
Using Reader Mode for Text Detection
Reader mode adds optical character recognition to the magnification experience. Press Command-R or click the Reader button in the toolbar, and Magnifier identifies text in the camera's view, rendering it in a clean, high-contrast format that eliminates background noise.
Reader mode proves especially useful for glossy packaging where reflections make direct viewing difficult. The OCR extracts the text and displays it against a solid background, removing the glare entirely. Adjust the font size within Reader mode using the text size controls in the toolbar.
The feature works best with printed text in standard fonts. Handwriting, stylized logos, and extremely small text may not detect reliably. For those situations, stick with the standard magnification view and apply contrast filters instead.
Customizing Filters and Display Settings
Magnifier includes several color filters accessible from the Filters menu. Options include grayscale, which reduces visual complexity; yellow text on black background, a combination many low-vision users prefer; and inverted colors, which swap light and dark. Each filter can improve readability depending on the source material and your personal visual needs.
Brightness and contrast sliders sit in the adjustment panel. Increasing contrast sharpens the distinction between text and background, while brightness adjustment compensates for dim or overexposed source lighting. The changes apply in real time, so you can dial in the settings while viewing the magnified content.
Freeze Frame, activated by pressing the spacebar, captures the current view and holds it static. This helps when you need to examine details without holding the camera steady or when the object cannot remain in position.
Accessibility and Clarity
Magnifier demonstrates thoughtful accessibility design throughout its interface. Every control responds to VoiceOver, with descriptive labels that announce filter names, zoom percentages, and camera sources accurately. The toolbar buttons maintain sufficient size and spacing for users with motor limitations, and keyboard shortcuts exist for all primary functions.
The color filter options specifically address needs beyond simple magnification. Yellow-on-black and inverted modes help users with certain types of color blindness or light sensitivity. High contrast settings benefit users with cataracts or other conditions that reduce contrast perception.
From a cognitive accessibility standpoint, Magnifier keeps its interface predictable. Controls remain in consistent positions, the toolbar does not change based on context, and there are no distracting animations or pop-up suggestions. The single-purpose nature of the app reduces cognitive load compared to multi-function accessibility suites.
If you want to explore another macOS Tahoe accessibility feature, check out the guide to Accessibility Reader in macOS Tahoe: https://www.nextlevelmac.net/accessibility-reader-in-macos-tahoe-turns-any-app-into-a-comfortable-read/
For users building a complete accessible Mac workstation, a quality webcam matters. The Mac webcams guide covers additional options: https://www.nextlevelmac.net/mac-webcams-that-make-you-look-pro-in-2026/
Quick-Action Checklist
- Open Magnifier: Applications > Utilities > Magnifier (or Spotlight search)
- Select camera source: Click dropdown in toolbar, choose iPhone or USB webcam
- Adjust zoom: Pinch trackpad or use zoom slider
- Apply filter: Filters menu > select preferred option (grayscale, inverted, yellow-on-black)
- Activate Reader mode: Press Command-R
- Freeze current view: Press Spacebar
- Adjust brightness and contrast: Use sliders in adjustment panel

Related Posts
Mac Accessibility for Dyslexia: Fonts, Tools, and Settings That Make Reading Easier
Jan 15, 2026
VoiceOver Keyboard Shortcuts Transform Mac Accessibility
Jan 15, 2026
Use AirPods Pro 3 as Hearing Aids on Your Mac in macOS Tahoe
Jan 14, 2026