You have a massive digital workspace sitting right in your Applications folder that most people completely ignore. Apple Freeform is a standard part of macOS Tahoe, and it is far more than a simple drawing tool. It is an infinite canvas designed for the way you think, plan, and create. While apps like Notes are great for text, Freeform allows you to spread out your ideas without the constraints of a digital page.
Every great project starts with a vision. Whether you are designing a new studio layout, mapping out a complex video tutorial, or just trying to organize a messy set of references, this app handles it with ease. Because it is a first-party Apple app, it integrates perfectly with your iCloud account and your other devices. You can start a board on your MacBook Pro and immediately see those updates on your iPad or iPhone.
Setting Up Your First Board
Getting started with Freeform on macOS Tahoe is straightforward. Open the app from your Dock or via Spotlight. You will see a clean gallery of your existing boards. To begin a new project, click the "New Board" icon in the toolbar. This creates a blank space that expands in every direction as you add content.
To make the most of your initial setup, I recommend these three steps:
Enable the Grid: Go to the View menu and select "Show Grid" to help align your elements.
Rename Your Board: Click the board name at the top left to give your project a clear, searchable title.
Set Zoom to Fit: Use the zoom controls at the bottom left to quickly see everything you have placed on the canvas.
Visual planning requires precision, especially when you are moving dozens of small elements around a large board. A standard laptop trackpad works well, but a dedicated ergonomic mouse provides the tactile feedback needed for long planning sessions. The Logitech MX Master 3S is a favorite for this because of its highly accurate sensor and customizable buttons.
Affiliate disclosure: some links in this article are Amazon Associate links. If you buy through them, Next Level Mac may earn a small commission at no extra cost to you, and we only recommend products that genuinely bring value to your Mac setup.
The Logitech MX Master 3S features a MagSpeed electromagnetic scroll wheel that lets you fly through massive boards or click through pixel-by-pixel for perfect alignment.
This is where to buy the Logitech MX Master 3S (Amazon Affiliate Link): https://www.amazon.com/dp/B09HM94VDS?tag=nextlevelmac-20
Mastering the Toolbar Tools
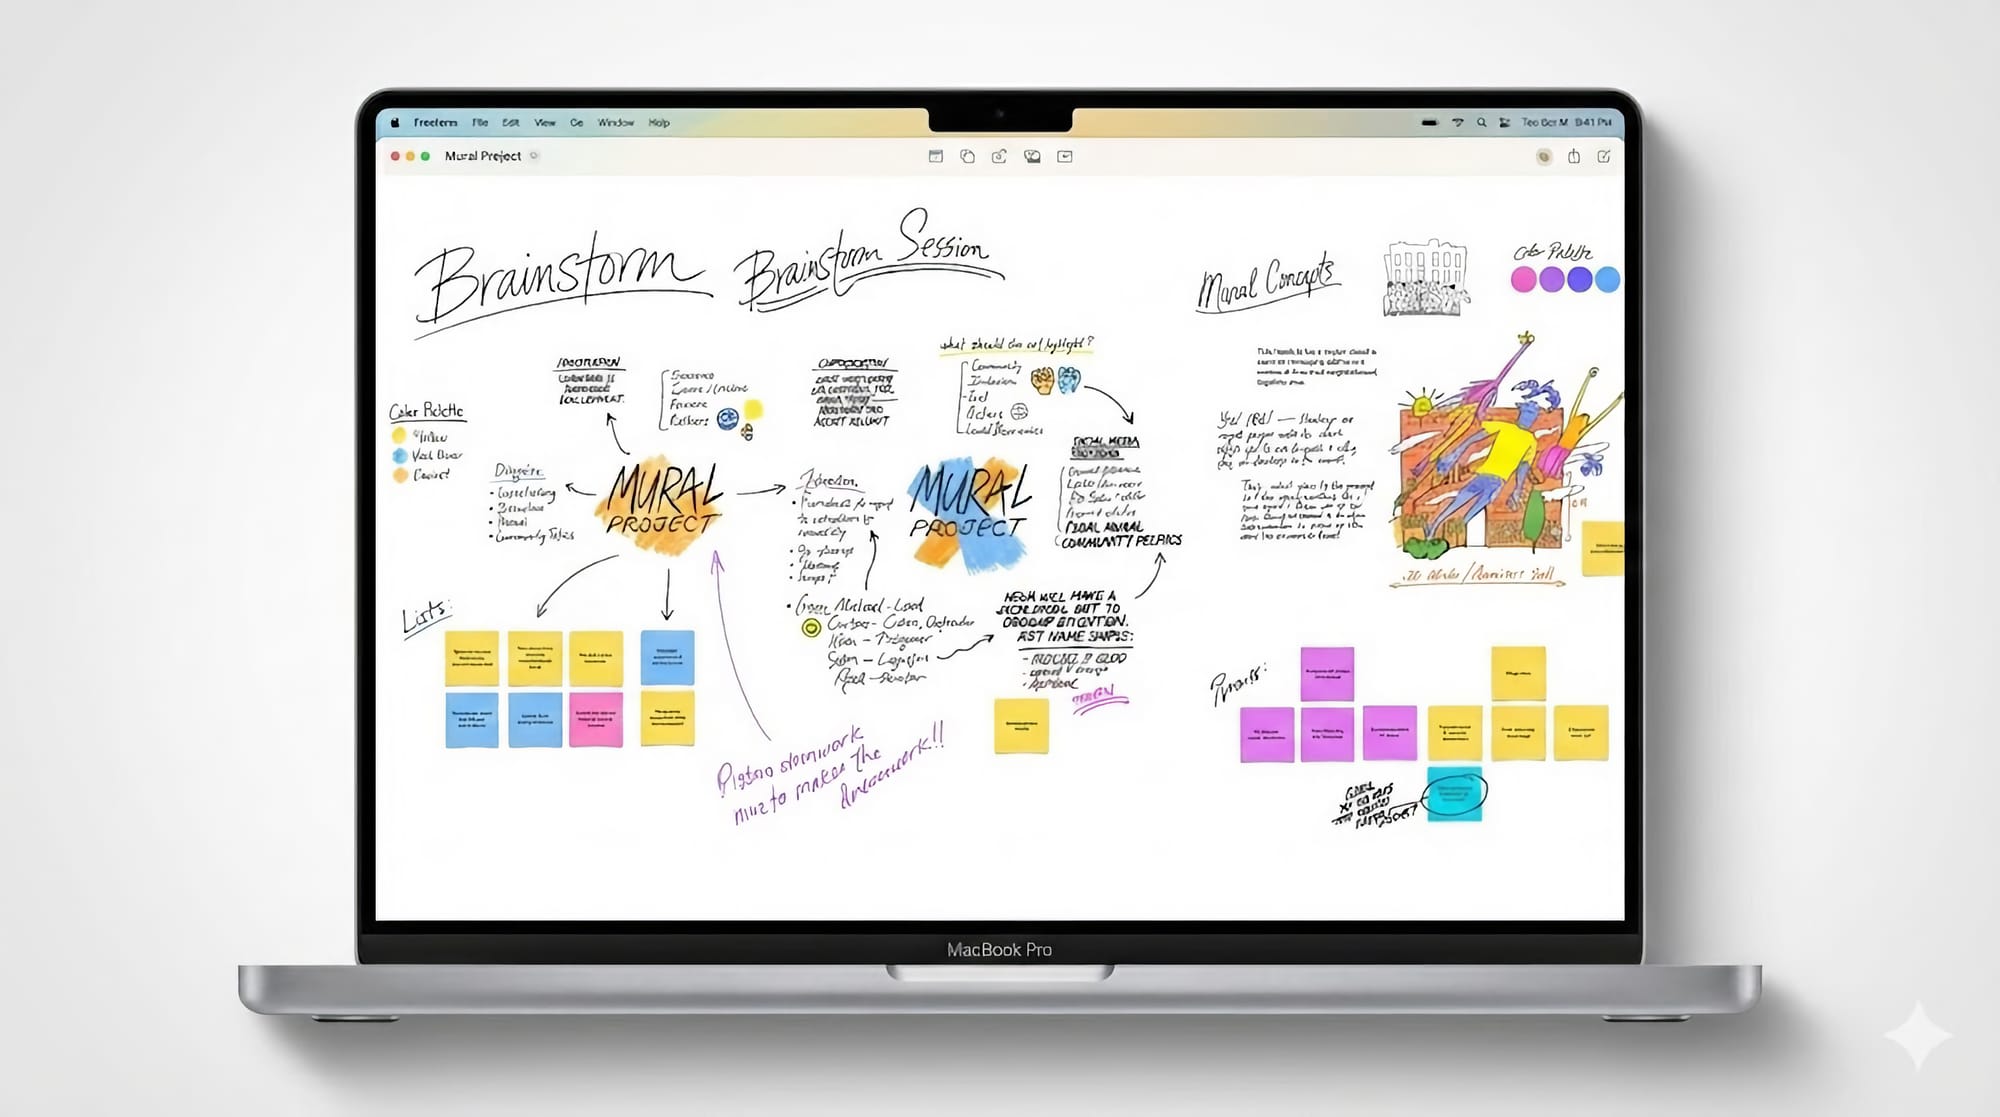
The toolbar in Freeform is deceptively simple. You have options for sticky notes, shapes, text boxes, and media. Sticky notes are perfect for quick brainstorming. You can change their color and font size to categorize different types of thoughts. Shapes are even more powerful in macOS Tahoe, as you can now use connector lines to link them together.
When you select the connector tool, you can click on one object and drag a line to another. This line stays attached even if you move the objects around. This makes Freeform an incredible tool for creating flowcharts or mind maps. You can also customize the line style, color, and thickness to match your visual aesthetic.
Adding media is where the app truly shines for creative professionals. You can drag and drop images, PDFs, videos, and web links directly onto the board. Freeform generates a rich preview for links, so you can see exactly what you are looking at without opening a browser. This is helpful for creating mood boards or gathering references for a new project.
If you find yourself running out of screen space while managing multiple media-heavy boards, a Thunderbolt hub can expand your workstation. A high-quality hub allows you to connect multiple 4K or 5K displays, giving your Freeform boards the room they deserve. The Satechi Thunderbolt 4 Hub is a reliable choice for MacBook Pro users who need extra ports for high-resolution monitors.
Where you can purchase the Satechi Thunderbolt 4 Hub (Amazon Affiliate Link): https://www.amazon.com/dp/B0BM1Q38T7?tag=nextlevelmac-20
Advanced Organization Techniques
Organizing a large board requires a bit of strategy. As you add more content, use the grouping feature to keep related items together. Select multiple objects by holding the Shift key or dragging a selection box around them, then right-click and choose "Group." This allows you to move entire sections of your project as a single unit.
Try these three organizational habits to keep your boards clean:
Layer Your Objects: Use the "Bring to Front" or "Send to Back" commands to stack images and notes effectively.
Lock Vital Elements: Right-click on a background image or a main header and select "Lock" to prevent accidental movement.
Use Descriptive Headers: Create large, bold text boxes to act as anchors for different zones on your canvas.
Freeform also supports a "Scenes" feature in macOS Tahoe. This allows you to save specific views of your board. You can quickly jump from your "Phase 1" notes to your "Final Design" area without manual scrolling. It functions like a presentation mode for your whiteboard, making it much easier to share your progress with others during a meeting.
Navigating these scenes and zooming in on fine details is often more intuitive with touch-based gestures. While the built-in trackpad on a MacBook Pro is excellent, an external trackpad provides a much larger surface area for complex gestures. The Apple Magic Trackpad is the best way to bring that fluid iPad-like navigation to your desktop setup.
The place to get the Apple Magic Trackpad (Amazon Affiliate Link): https://www.amazon.com/dp/B09BRG3MZ2?tag=nextlevelmac-20
Accessibility and Visual Customization
Visual accessibility is a core part of the macOS experience, and Freeform respects your system settings. For those who prefer or require high contrast, the app works beautifully in Dark Mode. Every color in the shapes and sticky notes palette is optimized to be legible against both light and dark backgrounds. This is a significant advantage for users with visual limitations like Retinitis Pigmentosa.
You can further enhance legibility by adjusting the default font sizes for your text boxes and notes. Use the "Format" menu to set global styles that work best for your vision. If you need to see a specific part of a board more clearly, the standard macOS zoom shortcuts (Command and Plus/Minus) allow you to scale the entire canvas instantly.
The app also supports VoiceOver, providing descriptions of the objects on your board. When you are collaborating with others, you can enable "Show Cursors" to see where your teammates are looking or what they are currently editing. This real-time feedback ensures everyone stays on the same page, regardless of how they interact with the software.
Collaborative Workflows
Sharing a board transforms Freeform from a personal scratchpad into a powerful team tool. Click the Share button in the toolbar to invite others via Messages or Mail. You can choose to give people full editing rights or keep the board as view-only. This is perfect for getting feedback on a layout or working together on a project in real-time.
When you collaborate, every change is synced via iCloud. If someone adds a photo or moves a note, the update appears on your screen almost instantly. You can even start a FaceTime call directly from within the Freeform app to discuss changes as you make them. This integration makes remote brainstorming feel much more personal and productive.
Follow these three steps for a smooth collaboration:
Set Permissions Early: Decide if your guests need to edit or just view the board before you send the link.
Check Shared Changes: Look for the highlighted names of collaborators to see who made recent updates.
Use the Activity Feed: Open the board settings to view a history of changes if you need to revert an accidental move.
Creative Use Cases
I find that Freeform is at its best when you use it for non-linear tasks. Planning a video thumbnail is a perfect example. You can drop in several variations of your background, overlay different text options, and move everything around until the composition feels right. It is much faster than using a full photo editor for the initial conceptual phase.
Another excellent use case is building a "Tech Stack" map. You can use icons for different software and hardware components, linking them with connector lines to show how your data flows. This provides a clear visual representation of your setup that is easy to update as you add new gear.
Finally, consider using Freeform as a digital travel planner. You can clip maps, screenshots of hotel bookings, and links to restaurants into one board. Because Freeform works offline, you can access all this information even when you don't have a reliable internet connection. Your board will simply sync your changes once you are back online.
Maximize Your Productivity
The key to mastering Freeform is to stop thinking of it as a document and start thinking of it as a room. You can leave things where they are, come back later, and find everything exactly as you left it. There is no "Save" button because everything is handled automatically by macOS.
To truly excel with the app, I recommend learning the keyboard shortcuts. Pressing "T" instantly creates a text box, while "S" brings up the shapes menu. These small efficiencies add up over time, allowing you to stay in your creative flow without hunting through menus. The more you use these shortcuts, the more the interface seems to disappear.
The infinite nature of the canvas means you never have to worry about running out of space. If a project grows larger than you expected, you can just keep dragging elements into new areas. Freeform will scale with your ambition. It is a rare piece of software that feels both powerful enough for professional work and simple enough for a quick grocery list.
Taking the time to explore Freeform on macOS Tahoe will change the way you organize your digital life. It bridges the gap between structured notes and creative chaos, giving you a space that adapts to your needs. Whether you are working on a 16-inch MacBook Pro or a desktop Mac Studio, the experience is fluid, fast, and remarkably helpful.

Related Posts
Finder Quick Actions in macOS Tahoe Automate File Tasks Instantly
Jan 12, 2026
Finder Smart Folders in macOS Tahoe Create Automatic File Organization
Jan 11, 2026
Apple Calendar in macOS Tahoe: Workflow Tips That Save Hours
Jan 11, 2026