This article contains affiliate links. As an Amazon Associate, Next Level Mac earns from qualifying purchases.
Window Tiling in macOS Tahoe is designed to make multiple apps feel organized instead of scattered. It’s simple, built-in, and perfect for a tidy, focused desk.
Think of it as a quick way to park windows in sensible spots. Notes next to Safari, Mail beside Calendar, or Photos next to Finder—no juggling or pixel-perfect dragging.
How Window Tiling works
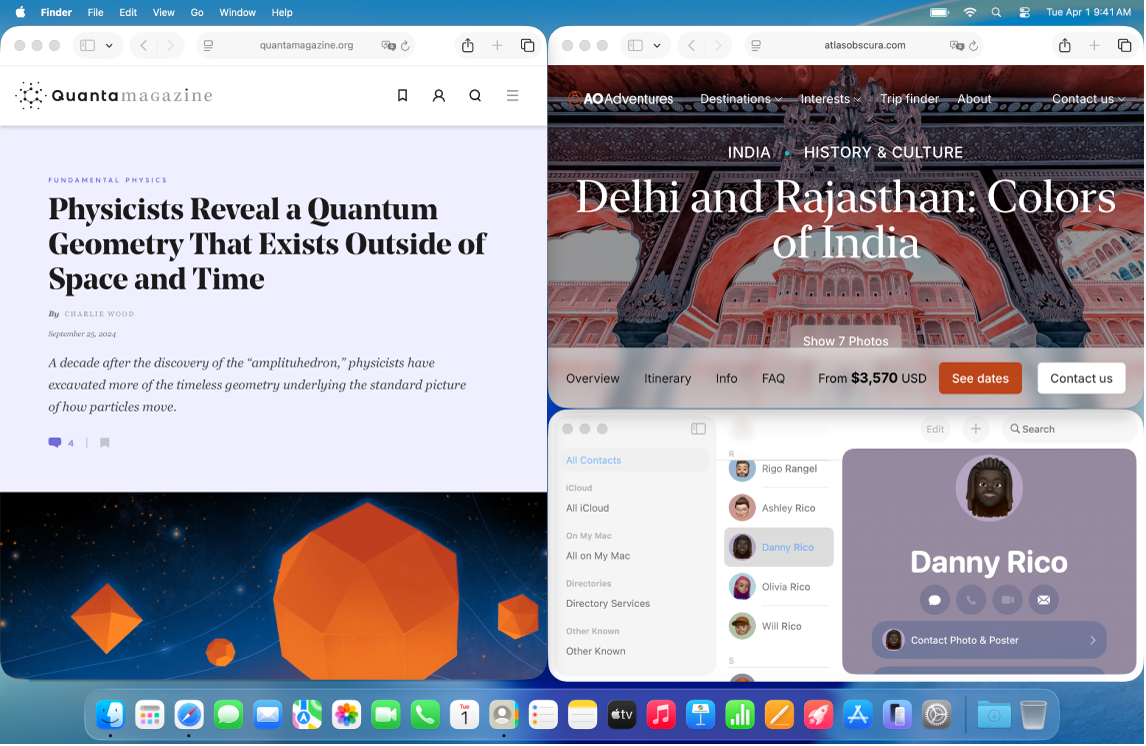
Every app window has a green “zoom” button in the top-left corner. Hover over it to reveal layout options like Tile Left or Tile Right on the current display.
Choose a side, and macOS places the window there while showing thumbnails for other open apps to fill the remaining space. Pick one and a clean two-pane workspace appears.
You can also drag a window toward the left or right edge until a subtle outline appears. Release the window and macOS snaps it into a half-screen position.
Corners work too. Drag toward a corner until the preview shows a smaller tile, then release to create a quarter-screen layout that’s great for chat or a timer.
Build your “work pairs”
Start with a simple duo: browser + notes. Put Safari on the left for reading and Notes on the right for quick capture. The pair encourages steady progress without hopping around.
Creative flow benefits from reference + canvas. Park Photos or Finder on the left and your editor of choice on the right to keep assets and the workspace in view.
Communication pairs reduce friction. Mail on the left and Calendar on the right keep context handy for scheduling without flipping to full-screen views.
Save time with small habits
Hovering the green button becomes second nature after a day. It’s the fastest way to try a layout without committing to full-screen.
When switching tasks, use Mission Control (F3 or swipe up with three/four fingers) to see everything at once, then drag windows into place on the same desktop.
Keep tiles consistent by anchoring your “primary” app on one side. For example, browser always on the left, companion app on the right.
External display tips
Window Tiling shines on a larger display. A 27-inch 4K panel provides crisp text and generous room for side-by-side apps without squinting.
One cable is ideal. A USB-C/Thunderbolt monitor that powers a MacBook turns docking into a single plug-in moment, keeping the desk minimal and tidy.
Clamshell mode helps. A vertical stand holds the MacBook closed, reduces footprint, and keeps thermals comfortable while the external display does the heavy lifting.
A few thoughtfully chosen accessories
A 27-inch 4K USB-C monitor pairs beautifully with Window Tiling. Dell’s S2722QC offers sharp text, a clean design, and USB-C connectivity for single-cable desk setups.
Get the Dell S2722QC here (Amazon Affiliate Linlk:
https://www.amazon.com/Dell-S2722QC-Response-Integrated-Speakers/dp/B09DTDRJWP?tag=nextlevelmac-20
A vertical stand keeps the MacBook steady in clamshell and frees desk space for a keyboard and trackpad. Twelve South’s BookArc is a compact, Mac-specific option.
Get the Twelve South BookArc here (Amazon Affiliate Linlk:
https://www.amazon.com/Twelve-South-Space-Saving-Vertical-notebooks/dp/B086RRJ82R?tag=nextlevelmac-20
A low-profile Bluetooth keyboard with Mac-first keys completes the setup. The Satechi Slim X3 adds a number pad, multi-device switching, and a comfortable, quiet feel.
Get the Satechi Slim X3 Keyboard here (Amazon Affiliate Linlk:
https://www.amazon.com/Satechi-Bluetooth-Backlit-Keyboard-Numeric/dp/B08Q5R3X1N?tag=nextlevelmac-20
Tiling layouts you can copy
Writing + research. Put Safari on the left half and Notes on the right. Add a quarter-screen floating tile for Dictionary or a PDF if you like a third reference.
Email triage. Mail left, Calendar right. When an event needs details, briefly expand Calendar, then hover the green button to snap it back to the right.
Photo import day. Finder on the left with your SD card folder in view; Photos on the right to drag albums in. A corner tile for Preview helps with quick checks.
Meetings made easy. Video call on the left and Notes on the right keeps agendas and action items visible. If you screen share, tile the document you’re presenting.
Make it stick with gentle consistency
Use the same desktop for recurring pairs. Reserving “Desktop 1” for writing and “Desktop 2” for admin makes tiles feel predictable and saves a few beats each day.
Close windows you don’t need. Tiles are about clarity, and a lean set of open apps keeps the layout responsive and distraction-free.
Favor split view over full-screen for desk work. Full-screen is great for deep focus, but side-by-side tiles help most everyday tasks move faster.
Troubleshooting common snags
If a window won’t tile, some apps use custom interfaces that resist snapping. Try resizing the window manually first, then hover the green button again.
If the wrong display tiles an app, drag the window to the desired monitor before hovering the green button. Tiling respects whichever screen holds the window.
Text looks soft? On a 27-inch 4K display, set scaling to “More Space” or “Default” in System Settings → Displays to balance crispness and room.
Create a desk that invites focus
Window Tiling is at its best when the desk feels simple. A clean monitor, a compact stand, and a quiet keyboard keep attention on the work, not the setup.
These small choices accumulate. The right screen size, one cable to connect, and a consistent layout routine turn daily tasks into easy rhythms.
With macOS Tahoe’s tiling built in, there’s no need for extra utilities or complicated rules. Set up a layout once, keep a few pairs handy, and let the Mac do the arranging.
Quick start checklist
Hover the green window button and choose Tile Left or Right to create your first pair. Fill the other side from the thumbnails that appear.
Drag to edges or corners to snap. Release when the preview outline appears for half- or quarter-screen tiles that feel balanced.
Try one external display for a week. Anchor a primary app on the left, a companion on the right, and keep that pattern going across days.
Add a vertical stand and a low-profile keyboard if you prefer clamshell mode. The footprint shrinks and the desk stays neat.
Return to Mission Control when switching projects. Drag windows into place on the same desktop to maintain order without thought.
The takeaway
Window Tiling in macOS Tahoe rewards a light touch. Keep pairings simple, pick a few habits, and let the feature reduce friction instead of adding rules.
A larger display, a secure stand, and a Mac-first keyboard complement the software beautifully. Together, they turn everyday workflows into easy, repeatable routines.

Related Posts
Finder Quick Actions in macOS Tahoe Automate File Tasks Instantly
Jan 12, 2026
Master Pixelmator Pro: The Ultimate Mac Photo Editor Guide
Dec 10, 2025
Keka: The Best Mac File Compressor
Dec 10, 2025